When we start the task of texturing the props, environments or characters, one of the first steps we accomplish after completing the UV Mapping, is baking different texture maps or procedural maps (or any other type) to a later use as a base point to paint our textures.
Probably the most baked map is the ambient occlusion, to reach a base of dirt on logic areas which we will modify in Photohop, BodyPaint or Mudbox.
With my own experience I think that occlusion bakes are incredibly useful but a
little bit boring.
Find below a simple method to create a more funny and live ambient occlusion bakes.
- Using a costant shader or any other which are not affected by lighting, we mix using mix2colors, blendColors or Mixer.
- In the channel 1 of the mix we use a map. Can be procedural or bitmap. In this example I'm using a tiled bitmap.
- In the channel 2 of the mix we use a white color.
- In the mask of the mix we use an ambient occlusion.
With this method we achieve that the bitmaps or procedural maps get masked by the occlusion, creating dirt on the logical and less exposed areas, but with the variation given by the map.
The keys to reach good results are the configuration of the occlusion and the quality of the maps.
---
Versión en Castellano.
Cuando comenzamos la tarea de texturizar un prop, escenario o personaje, uno de los primeros pasos que damos tras terminar el UV Mapping, es hacer distintos bake textures o rendermaps de diferentes mapas prodedurales (o de otro tipo), para a posteriori utilizar como punto de partida para pintar nuestras texturas.
Probablemente el mapa que más "bakeamos" sea el ambient occlusion, para disponer de una base de suciedad lógica, que modificaremos en Photoshop, BodyPaint o Mudbox.
Con el paso del tiempo, he llegado a la conclusión de que los bakes de occlusion aunque son realmente útiles,
son un poco aburridos por si solos.
Aquí abajo muestro un simple método para que los dirtmaps generados mediante ambient occlusion tengan un poco más de vida.
- Partiendo de un shader tipo constant o cualquier otro que no le afecte la iluminación mezclamos mediante un mix2colors, blendColors o Mixer.
- En en canal 1 de la mezcla utilizamos un mapa. Puede ser prodecural o bitmap. En este ejemplo estoy utilizando un bitmap previamente "tileado".
- En el canal 2 de la mezcla utilizamos un colo blanco.
- En el canal de máscara de la mezcla utilizamos un ambient occlusion previamente configurado.
Con esto conseguimos que el mapa de bits o procedural esté enmascarado por la occlusion, creando suciedad en las zonas lógicasny menos expuestas, pero con la variación dada por el mapa.
Las claves para obtener buenos dirtmaps base, son la configuración de la occlusion y la trama del mapa de bits o procedural.
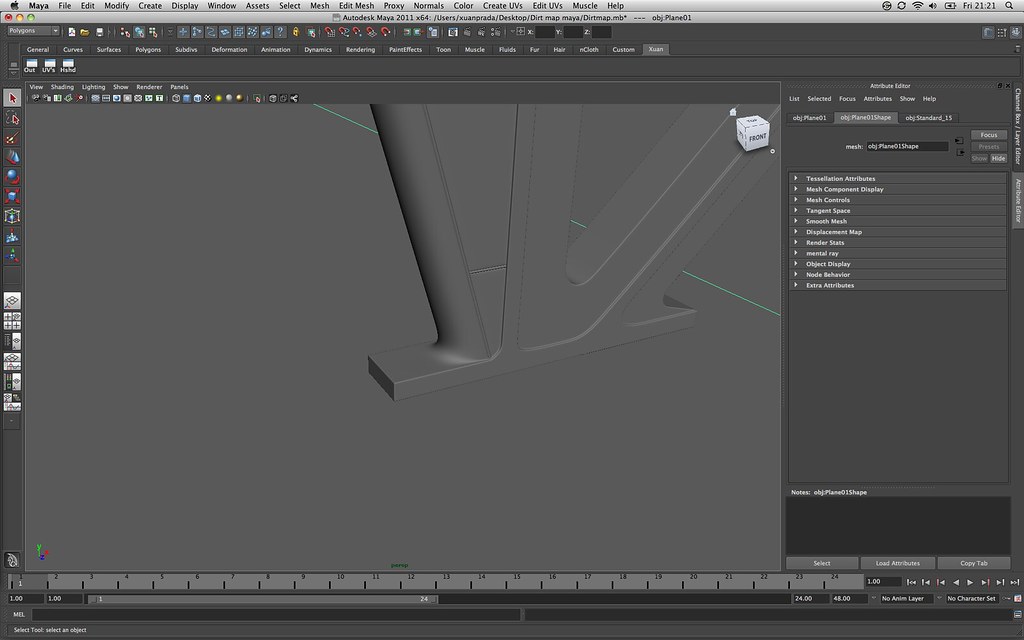
Sample scene.
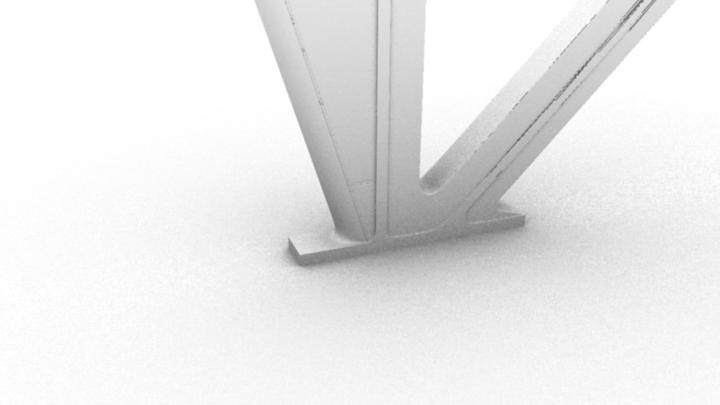
Occlusion, boring.

DirtMap, funny.
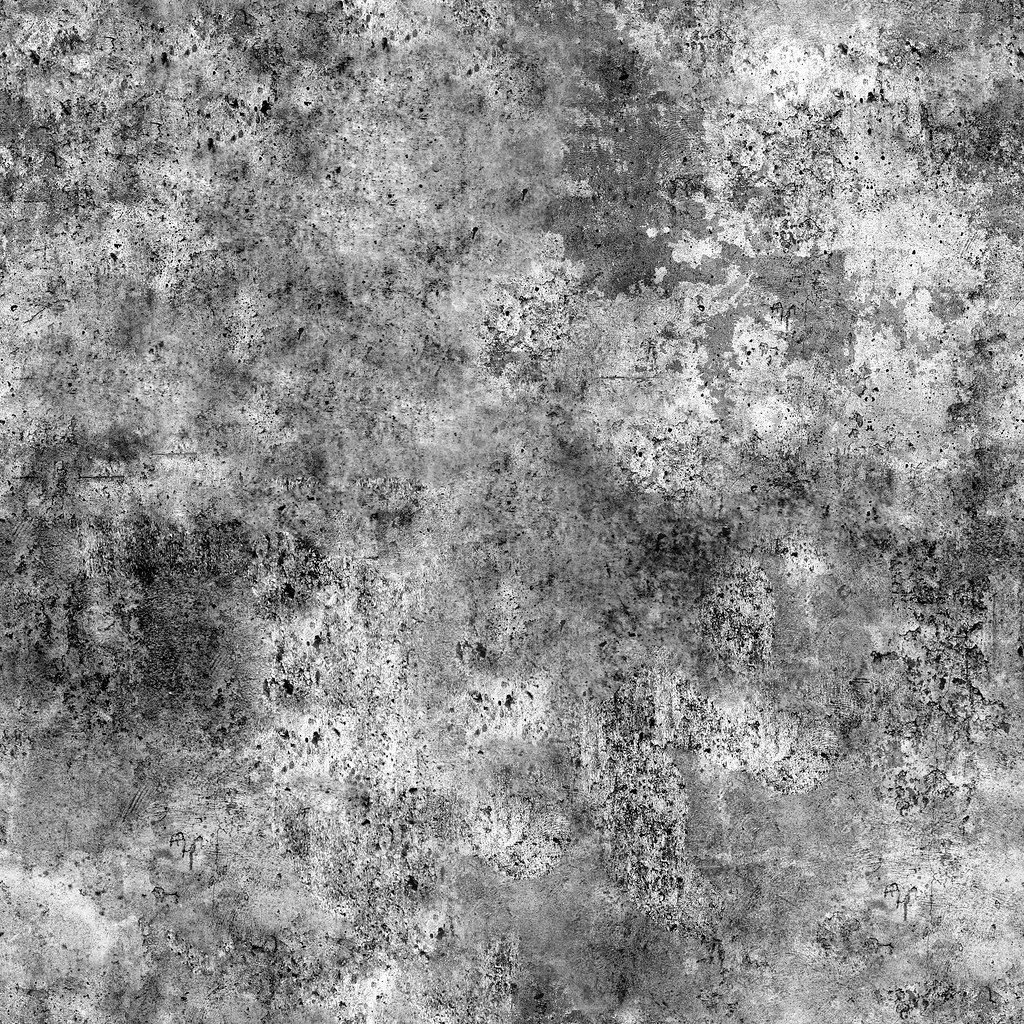
Dirt texture map.
RenderTree network.
HyperShade network.
3D Max MatEditor.